I have set myself a very challenging goal for my vegetable garden in 2011!! I want to make my vegetable garden this year organic and best of all, I want to achieve self sufficiency...
So I will describe all the steps of what I will do this year to achieve my goal. So here is the first post:
PLANNING
The first thing I did was draw the design of my garden in paper. I am trying a new method this year called the square foot gardening (SFG). Basically, you build this square box of 4x4 feet and divide it into 8 1x1 spaces. You plant different arrangements of plants in each of the 1x1 boxes. As I have already built-in beds in my house, I modified the process and measured my boxes and divided the area in as many 1x1 boxes I could fit in.
The idea of SFG is that you can increase the yield of your garden by planting together instead of in rows. As I want to be self sufficient and I have limited space, this seems the way to go.
I ended up with lots of 1x1 boxes. I then put the name of the plant I want to grow in each square. In order to do this I took into account the following:
- My family's preference in vegetables - no point on growing something nobody will eat!!
- The size of the plant (visualize the full grown plants)- as my boxes are against my house, I put the tallest plants close to the walls so they do not shade the others.
- What I planted last year in the space so I can achieve a good rotation and not deplete my soil of nutrients. I normally rotate as follows: year 1- brassicas, year 2 -roots, year 3- others and start all over again in year 4.
SEEDLINGS
I have just planted our first set of seeds for the garden. I am starting all the seeds indoors, off course as it is still freezing out there. I live in Zone 5 so snow is still in the ground. I have started with the cold season vegetables as there are the first ones that are going to be planted outside.
This is what I just planted:
- 2 different types of peas (sugar snap and a round one)
- Iceberg Lettuce
- Spinach
- Arugula
- Broccoli
- Onions - from seeds collected from my onions last year
- Coriander (this I will keep inside for longer - not a cold season crop)
- Beans (my kids got these as a project at school so they will also stay indoors for longer)
I am also trying to not be wasteful with my seeds, I collected as many seeds as I could from last year's vegetables (if you need any home grown seeds let me know!). I am putting only 2 or 3 seeds per container vs. seeding outdoors hundreds of them only to have to thin them all!
For seedling medium - I refused to buy the ohh so expensive (although I know is good) stuff they sell at garden centers, so I did my own with garden soil and free composted horse poop!!! (this one is the subject of another post)
In the next couple of weeks I will prepare the soil - Stay tuned.
DAY 3 Photo - Onions and Arugula sprouted already
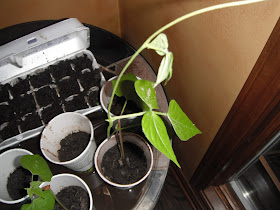
DAY 12 Photos: A few more seddlings
4 weeks later:
If you like this post you may also like:


No comments:
Post a Comment
Thanks for your comment!